Introduction: Cheese, Garlic & Magic in Every Bite
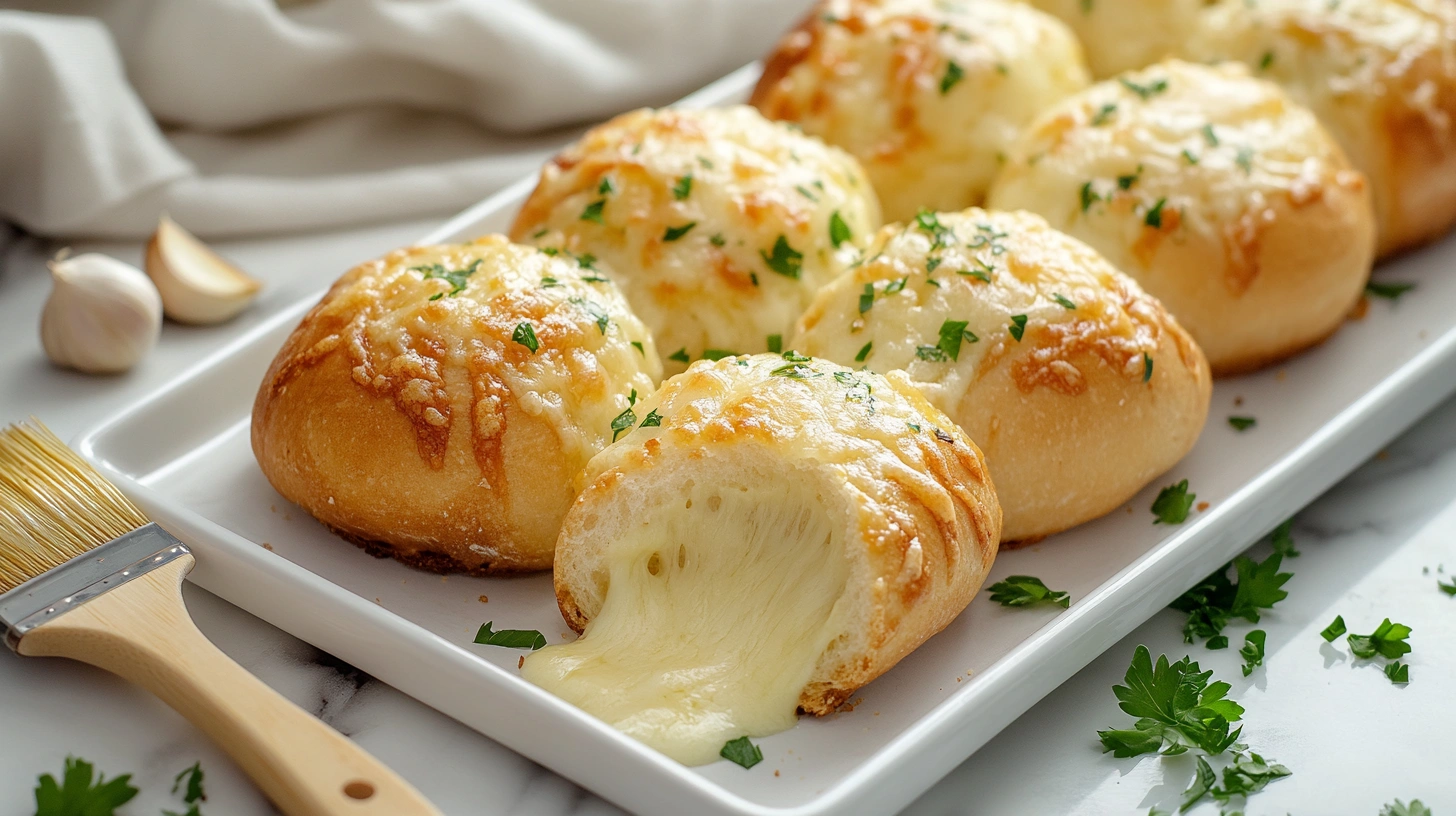
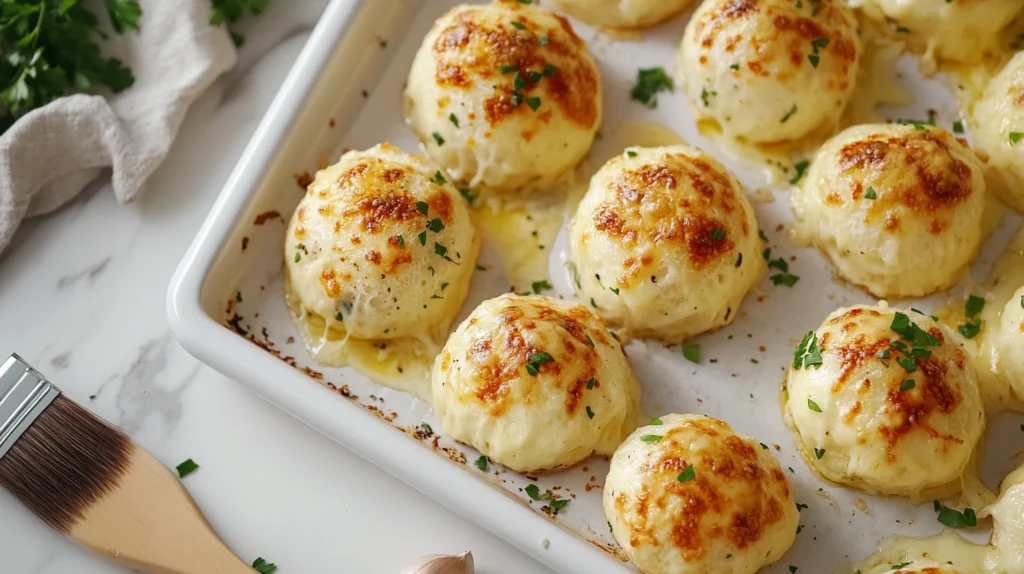
Imagine biting into a soft, golden biscuit, warm from the oven. As you pull it apart, molten cheese stretches beautifully, infused with garlic butter and a hint of herbs. That’s exactly what you get with these Garlic Cheese Bombs — and they only take 20 minutes from start to finish!
Whether you’re hosting a cozy dinner, a game night, or just craving something indulgent, these bombs never disappoint. Just like our Garlic Parmesan Cheeseburger Bombs and Cheesy Potato Pancakes, this recipe is a reader favorite for a reason.
🧀 Ingredients You’ll Need To Make Garlic Cheese Bombs
You only need simple pantry staples and your favorite cheese:
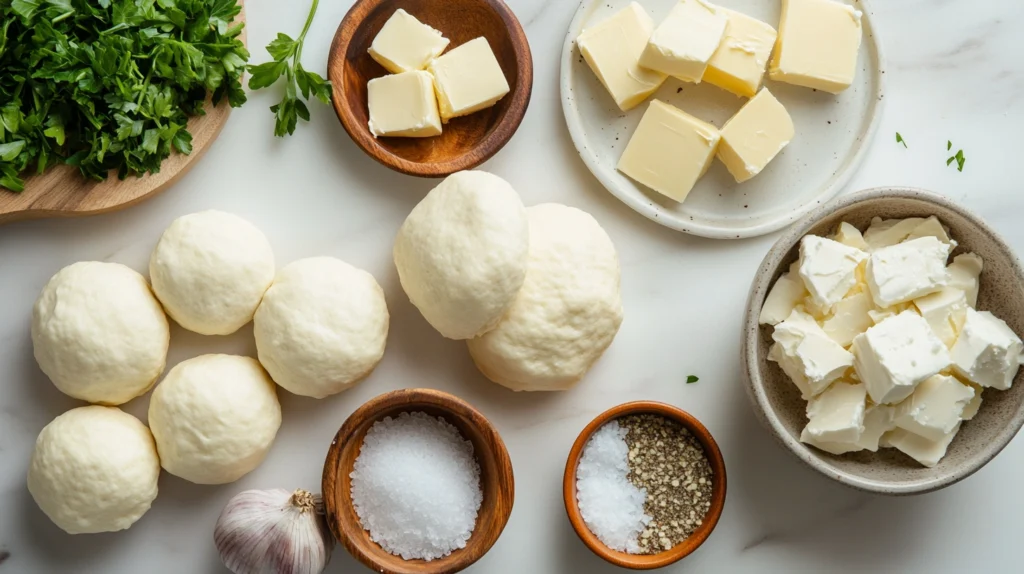
- 1 can of refrigerated biscuit dough (8-count)
- 8 cubes of mozzarella or cheddar cheese
- 3 tablespoons of melted unsalted butter
- 2 garlic cloves, finely minced
- ½ teaspoon Italian seasoning
- 1 tablespoon chopped parsley (optional)
- Pinch of sea salt or flaky salt for topping
👩🍳 Step-by-Step Instructions Garlic Cheese Bombs
Follow these simple steps for perfect, melty cheese bombs every time:
🔹 Step 1: Prep and Preheat
Preheat your oven to 375°F (190°C). Line a baking tray with parchment paper or grease it lightly.
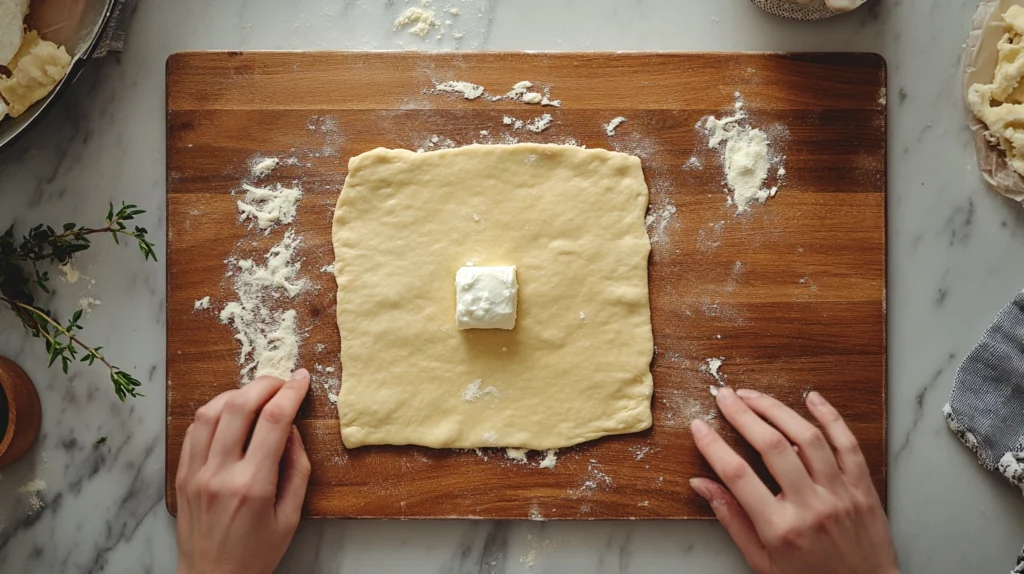
🔹 Step 2: Flatten and Fill
Take one biscuit and flatten it in your palm. Place a cube of cheese in the center, then pinch the dough around it to form a sealed ball.
🔹 Step 3: Arrange and Season
Place each cheese-filled ball seam-side down on your prepared tray. Mix the melted butter with minced garlic, Italian seasoning, and a pinch of salt. Brush each dough ball generously.
🔹 Step 4: Bake to Golden Perfection
Bake in the preheated oven for 12–15 minutes, or until the tops are golden brown and crisp.
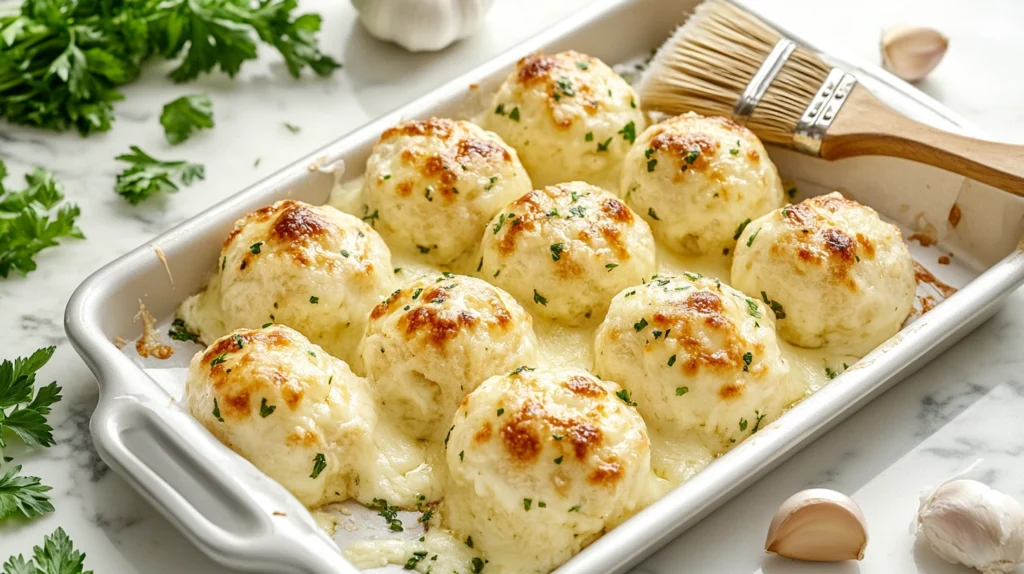
🔹 Step 5: Garnish and Serve
Brush the tops with leftover garlic butter and sprinkle with fresh parsley. Serve warm while the cheese is still gooey!
🍴 Serving Suggestions Garlic Cheese Bombs
Pair these Garlic Cheese Bombs with:
- A bowl of warm Sweet and Spicy Chili
- Creamy tomato soup
- Your favorite salad or pasta.
🔄 Variations & Customizations The Garlic Cheese Bombs
Want to get creative? Here are some delicious variations:
- Pizza Bombs: Add a slice of pepperoni inside with mozzarella.
- Spicy Bombs: Add a pinch of crushed red pepper flakes to the butter.
- Stuffed with Jalapeño: Mix in a slice of jalapeño for a bold twist.
- Vegan Version: Use plant-based biscuit dough and vegan cheese.
🧊 Storage Tips Garlic Cheese Bombs
- Store leftovers in an airtight container at room temperature for 1 day, or refrigerate for up to 3 days.
- To reheat, pop them in the oven or air fryer at 350°F (175°C) for 5–6 minutes.
- Freezing is possible, but best done before baking. Just assemble, freeze on a tray, then transfer to a freezer bag.
🧠 Expert Tips for Success The Garlic Cheese Bombs
- Don’t overfill with cheese — or it may leak during baking.
- Seal the dough well to keep all the cheesy goodness inside.
- Brushing with garlic butter before and after baking makes them extra flavorful and shiny.
- Try using herbed butter or add parmesan for even more richness.
Why These Garlic Cheese Bombs Are Better Than Store-Bought Snacks
Unlike frozen garlic bread or cheese sticks, these homemade garlic cheese bombs are freshly baked, customizable, and preservative-free. You control the ingredients, which means you can adjust the level of garlic, choose your favorite cheeses, and even make them gluten-free or keto-friendly. Plus, the aroma of warm garlic and melted cheese filling your kitchen? Absolutely unbeatable.
📌 Final Thoughts About Garlic Cheese Bombs
These Garlic Cheese Bombs are quick, indulgent, and dangerously addictive. Whether served as an appetizer, side, or snack, they always steal the show. Easy enough for weeknights and fancy enough for guests — it’s a win either way.